Tank Bot - Raspberry Pi + Video + OpenCV + PS5 Controller
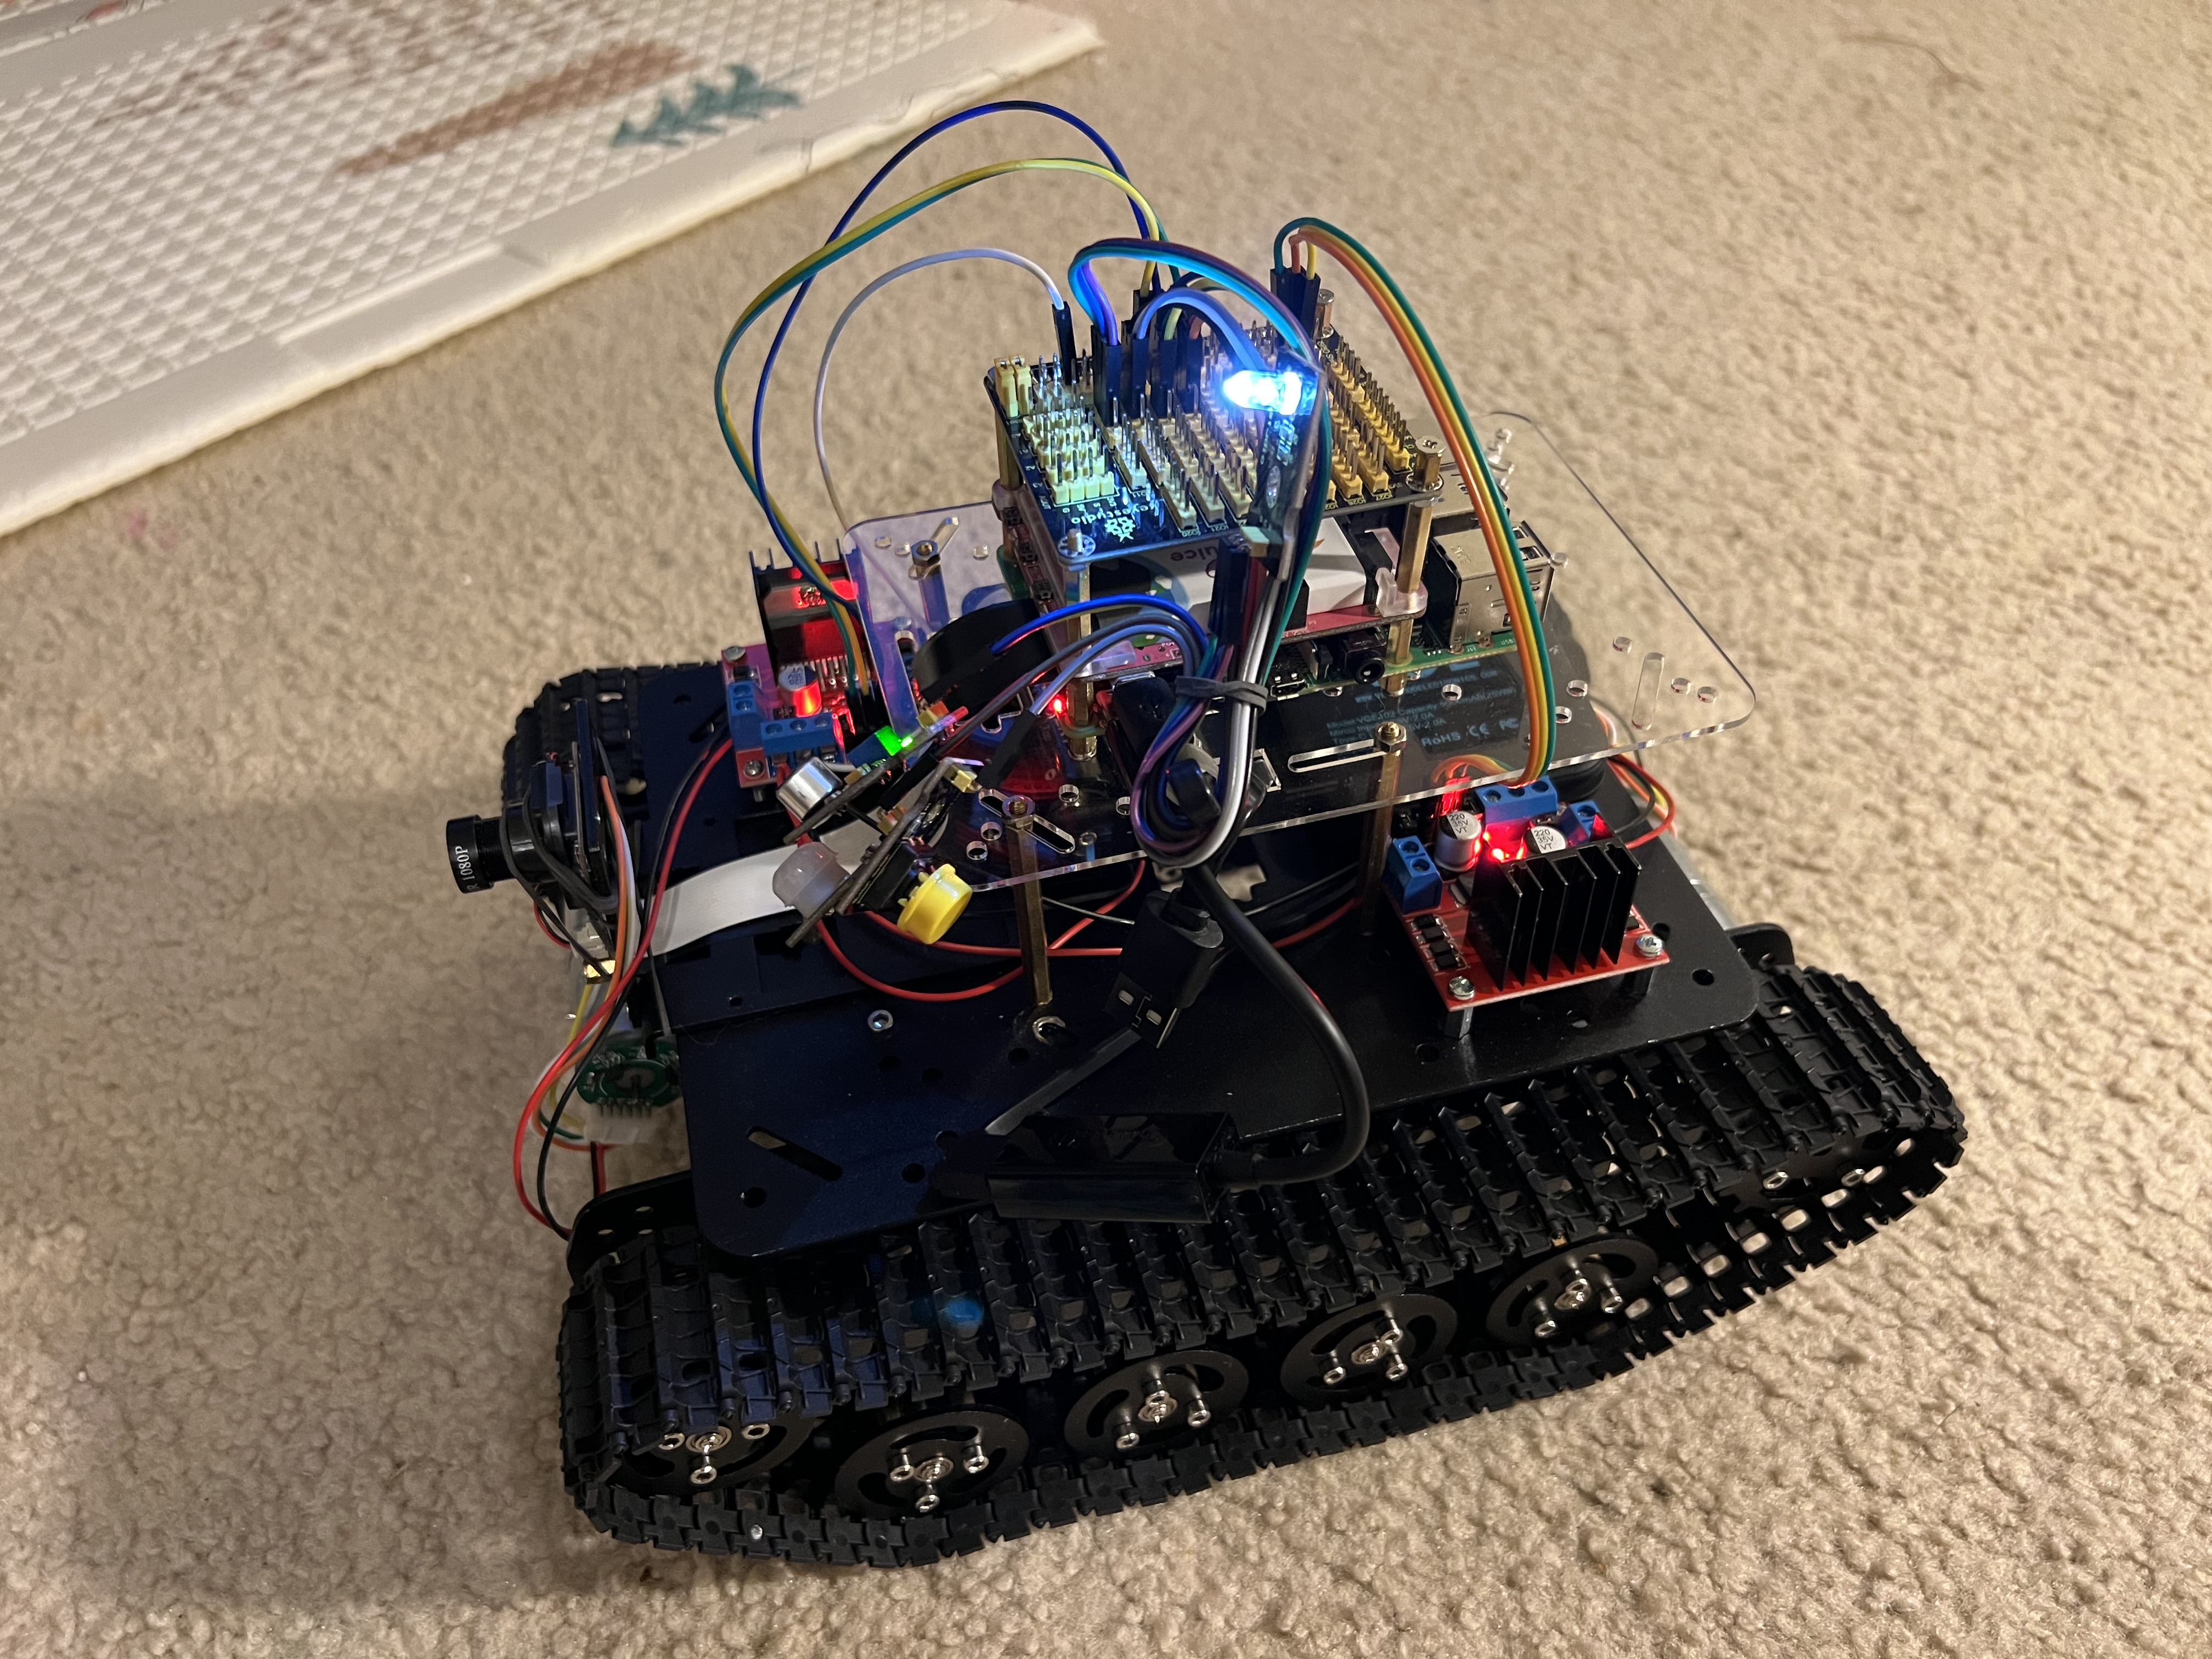 The finished Tank Bot is equipped with a Raspberry Pi 4, a camera, and other sensors.
Background
When building the Hexapod Spider Bot and dealing with the complexities involved with handling legs, I began to wonder if maybe I should have just started with a tank instead. Perhaps it would be a better ROI since the tank will be fast, stable, and easier to code for than 6 jointed legs. With a reliable vehicle base that can navigate most terrain, we should then be free to focus on the "brain" of the robot or other features.
When building the Hexapod Spider Bot and dealing with the complexities involved in managing legs, I began to wonder if perhaps I should have started with a tank instead. The tank would be fast, stable, and easier to program than six jointed legs. With a reliable vehicle base that can navigate most terrains, we could then focus on the "brain" of the robot or other features.
Notable Components
- Tank Chassis Selection
- L298N Motor Driver
- Remote Control via RF24
- Tank Client/Server via REST API
- Portable Power Supply
- Streaming Video + OpenCV
- Extensible Sensor/Peripherals
1. Selecting the Tank Chassis
While browsing Amazon one day, I came across this chassis. It's made up of an extensible metal base and high-quality track treads with suspension. Assembling the chassis was straightforward.
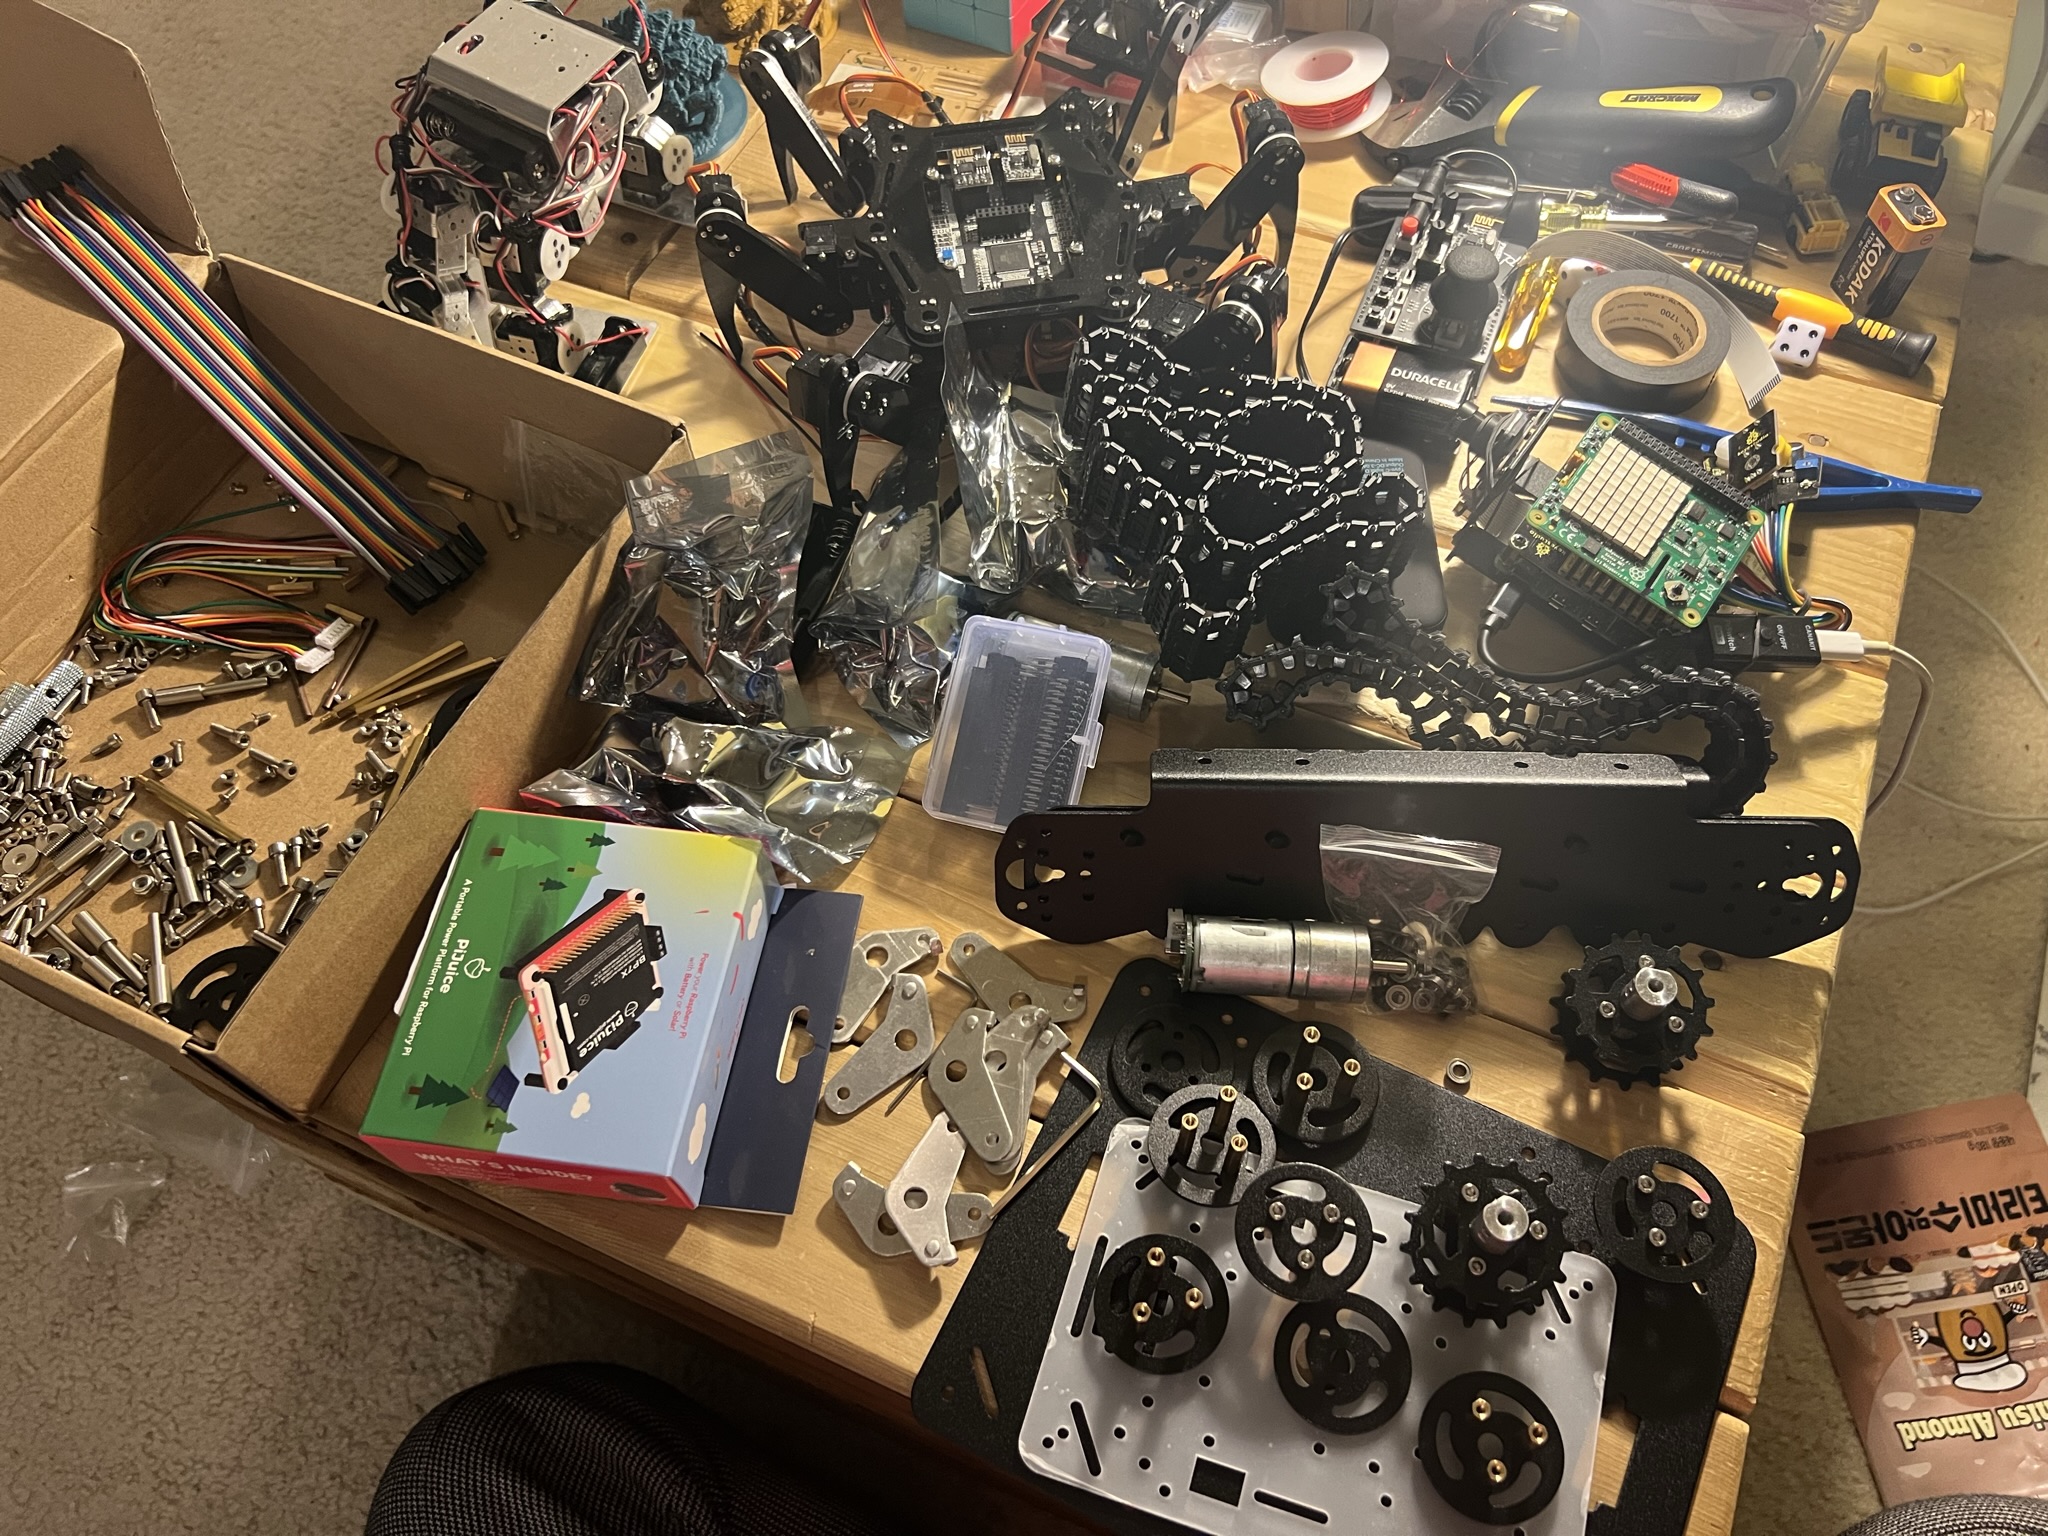
Chassis along with other components
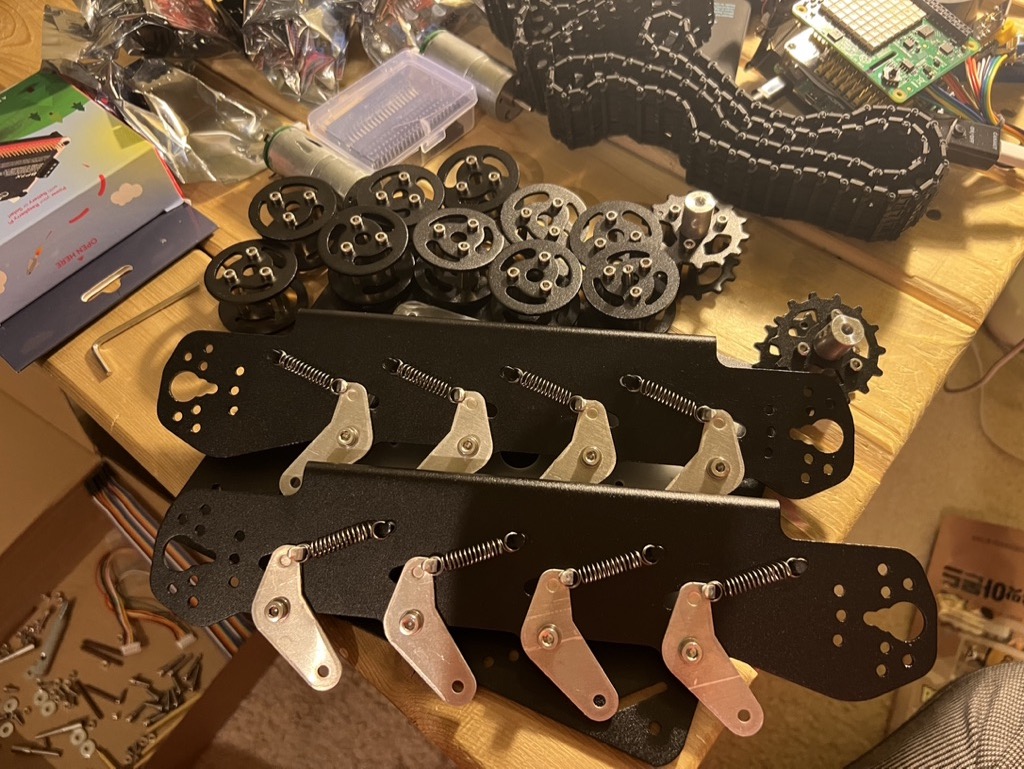
Building wheel-mounts and suspension
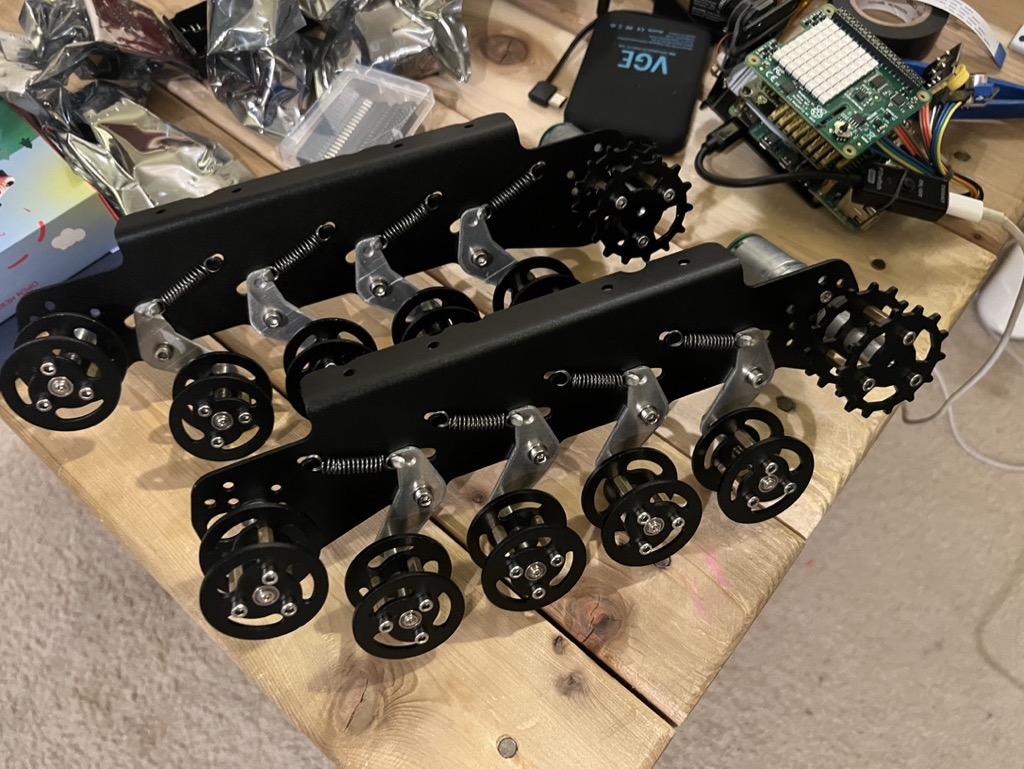
Attaching wheels
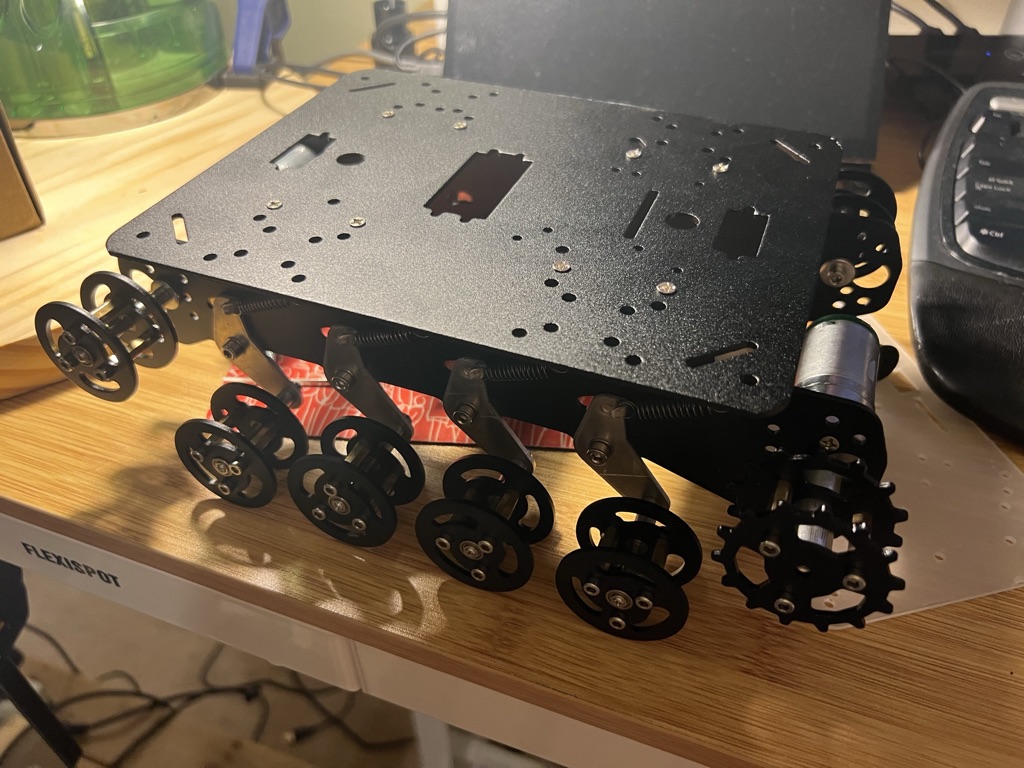
Attaching the base platform
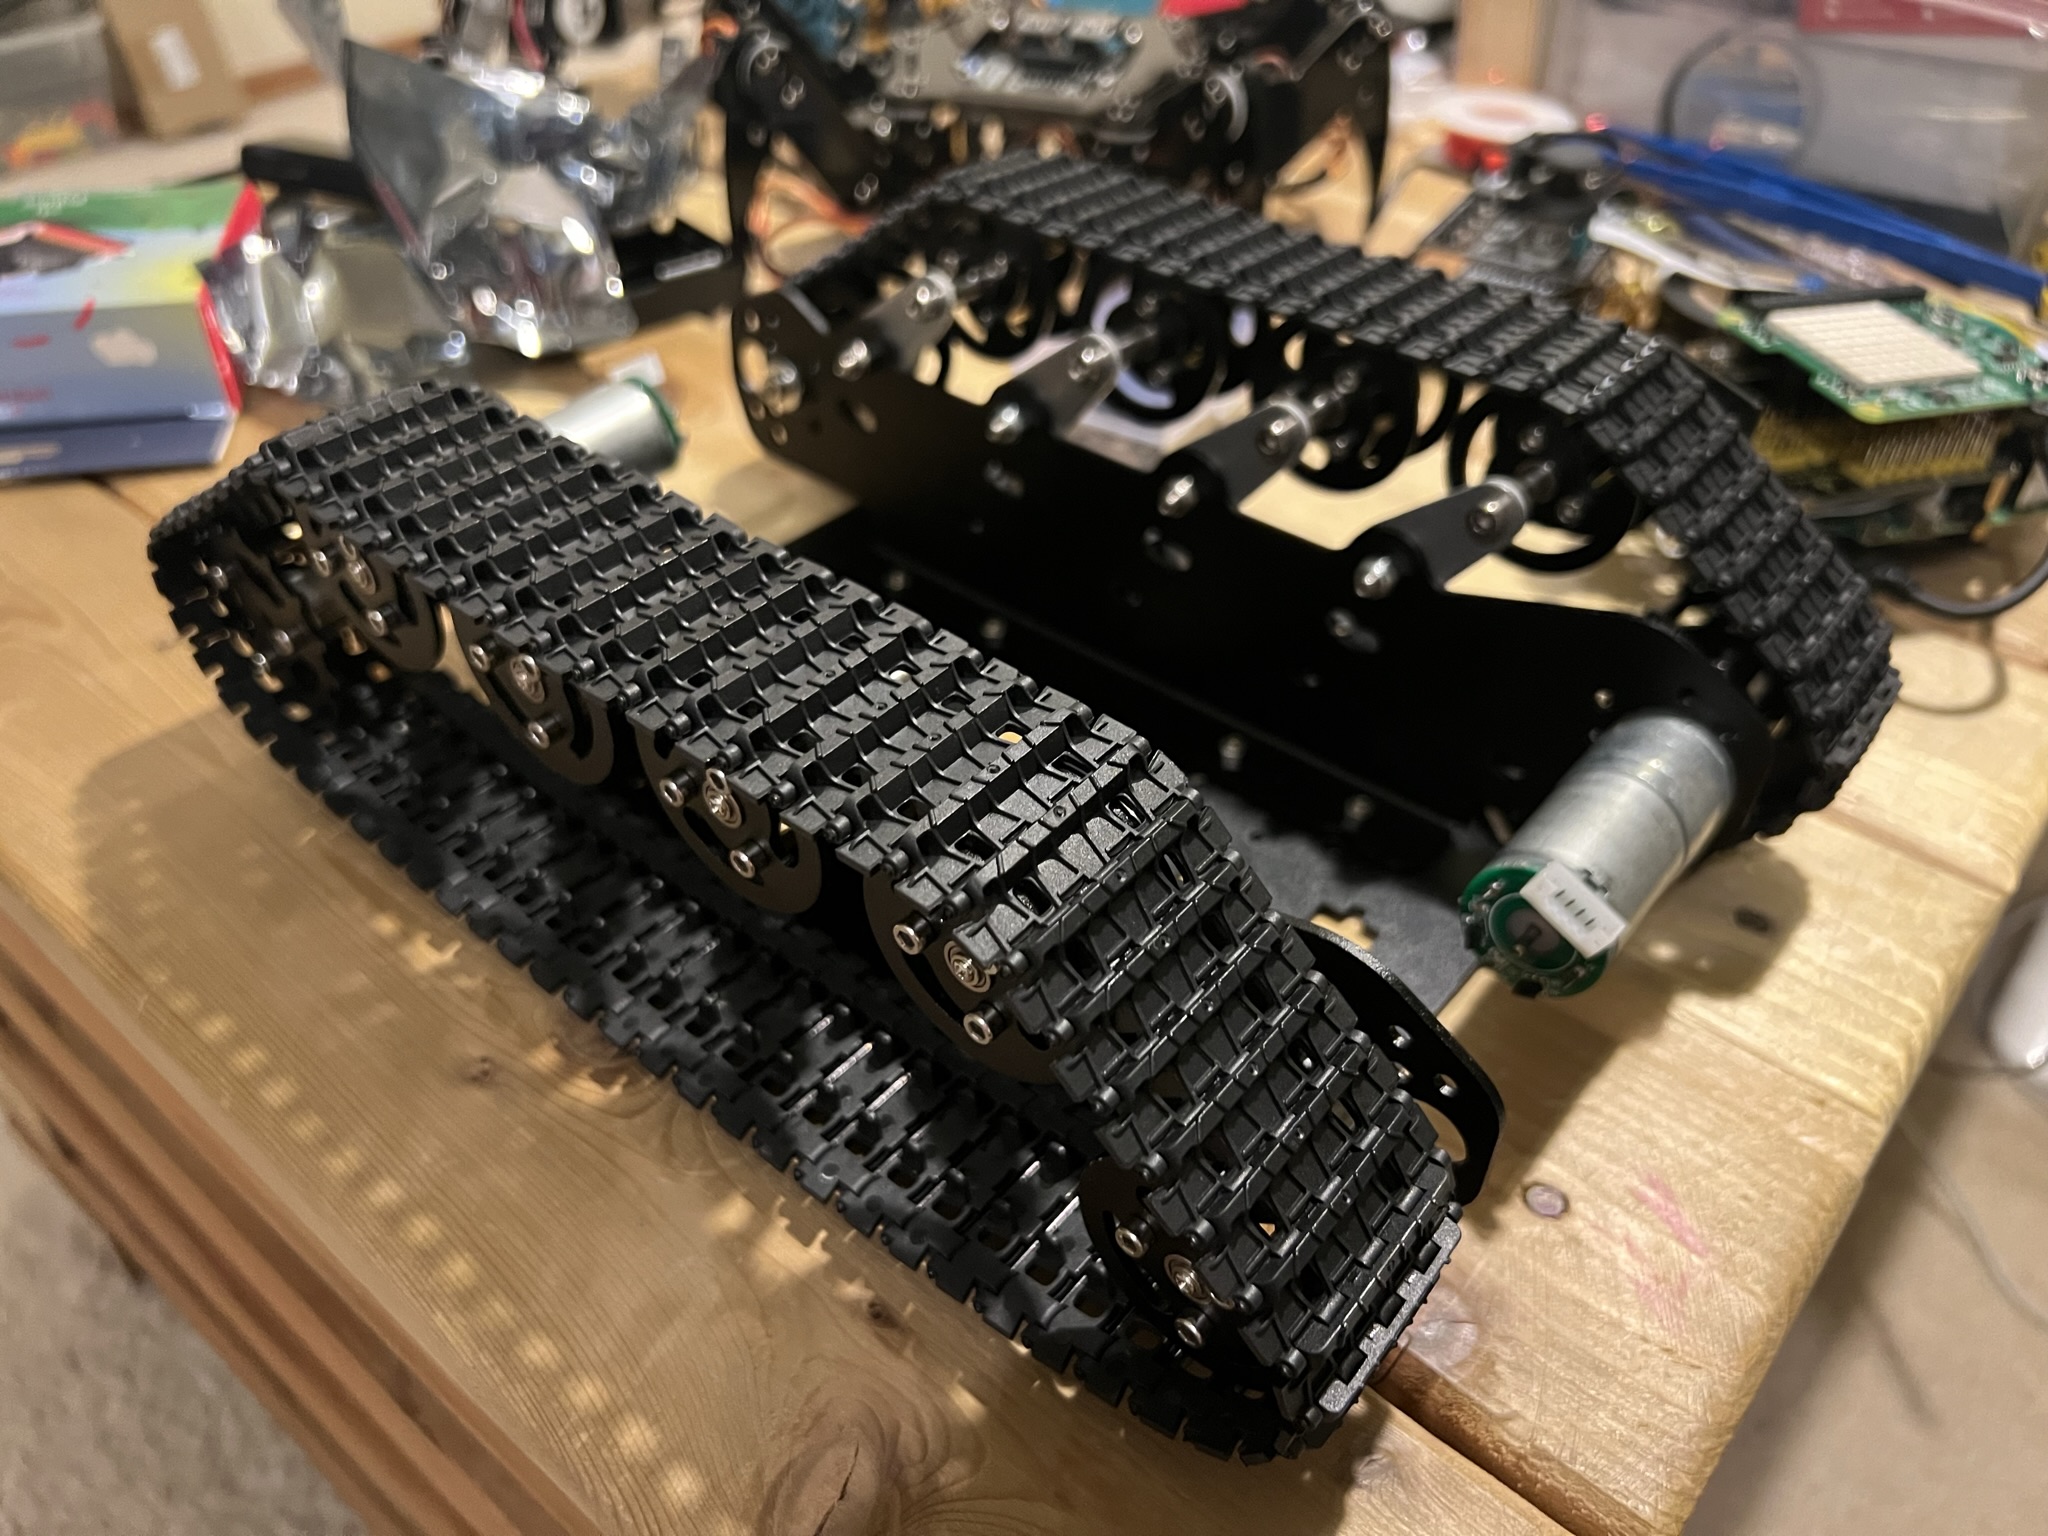
Attaching track treads
2. L298N Motor Driver
The first significant challenge I faced was determining how to power and control the DC motors from a Raspberry Pi. I've found that the KEYESTUDIO GPIO Breakout Board is an excellent choice for easy communication with peripherals. Next, I decided to use a L298N Motor Driver to interface with the DC motor. The L298N chip simplifies the implementation of variable speed and reverse functions, while also protecting the motors and electronics.
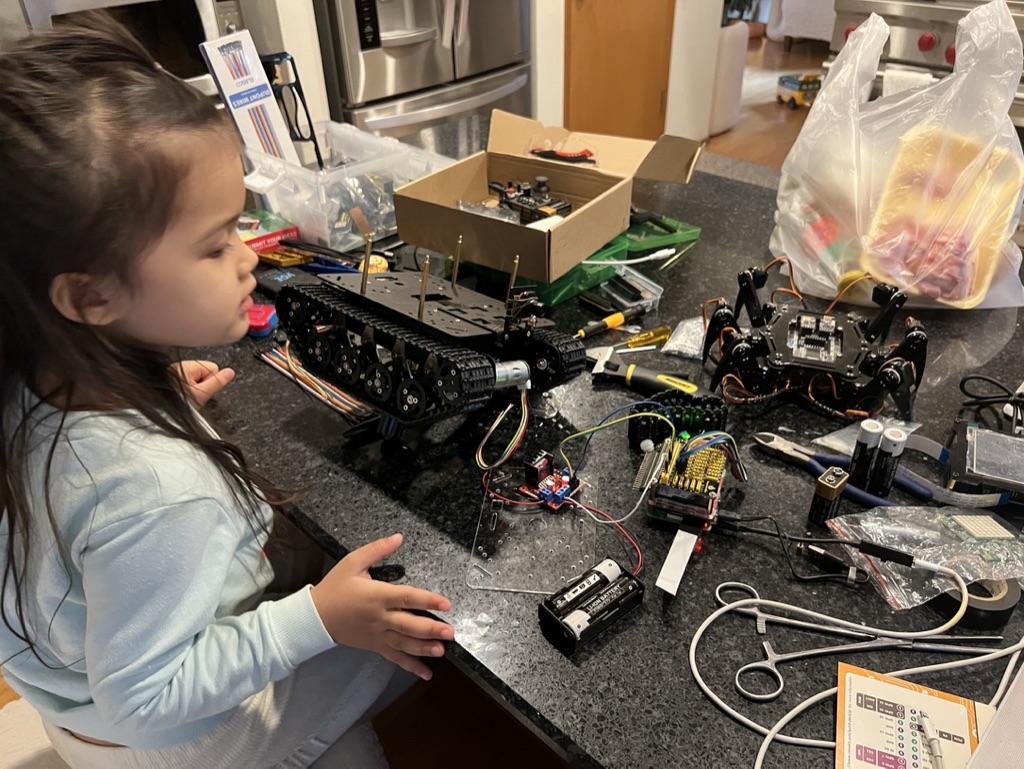
A working L298N prototype!
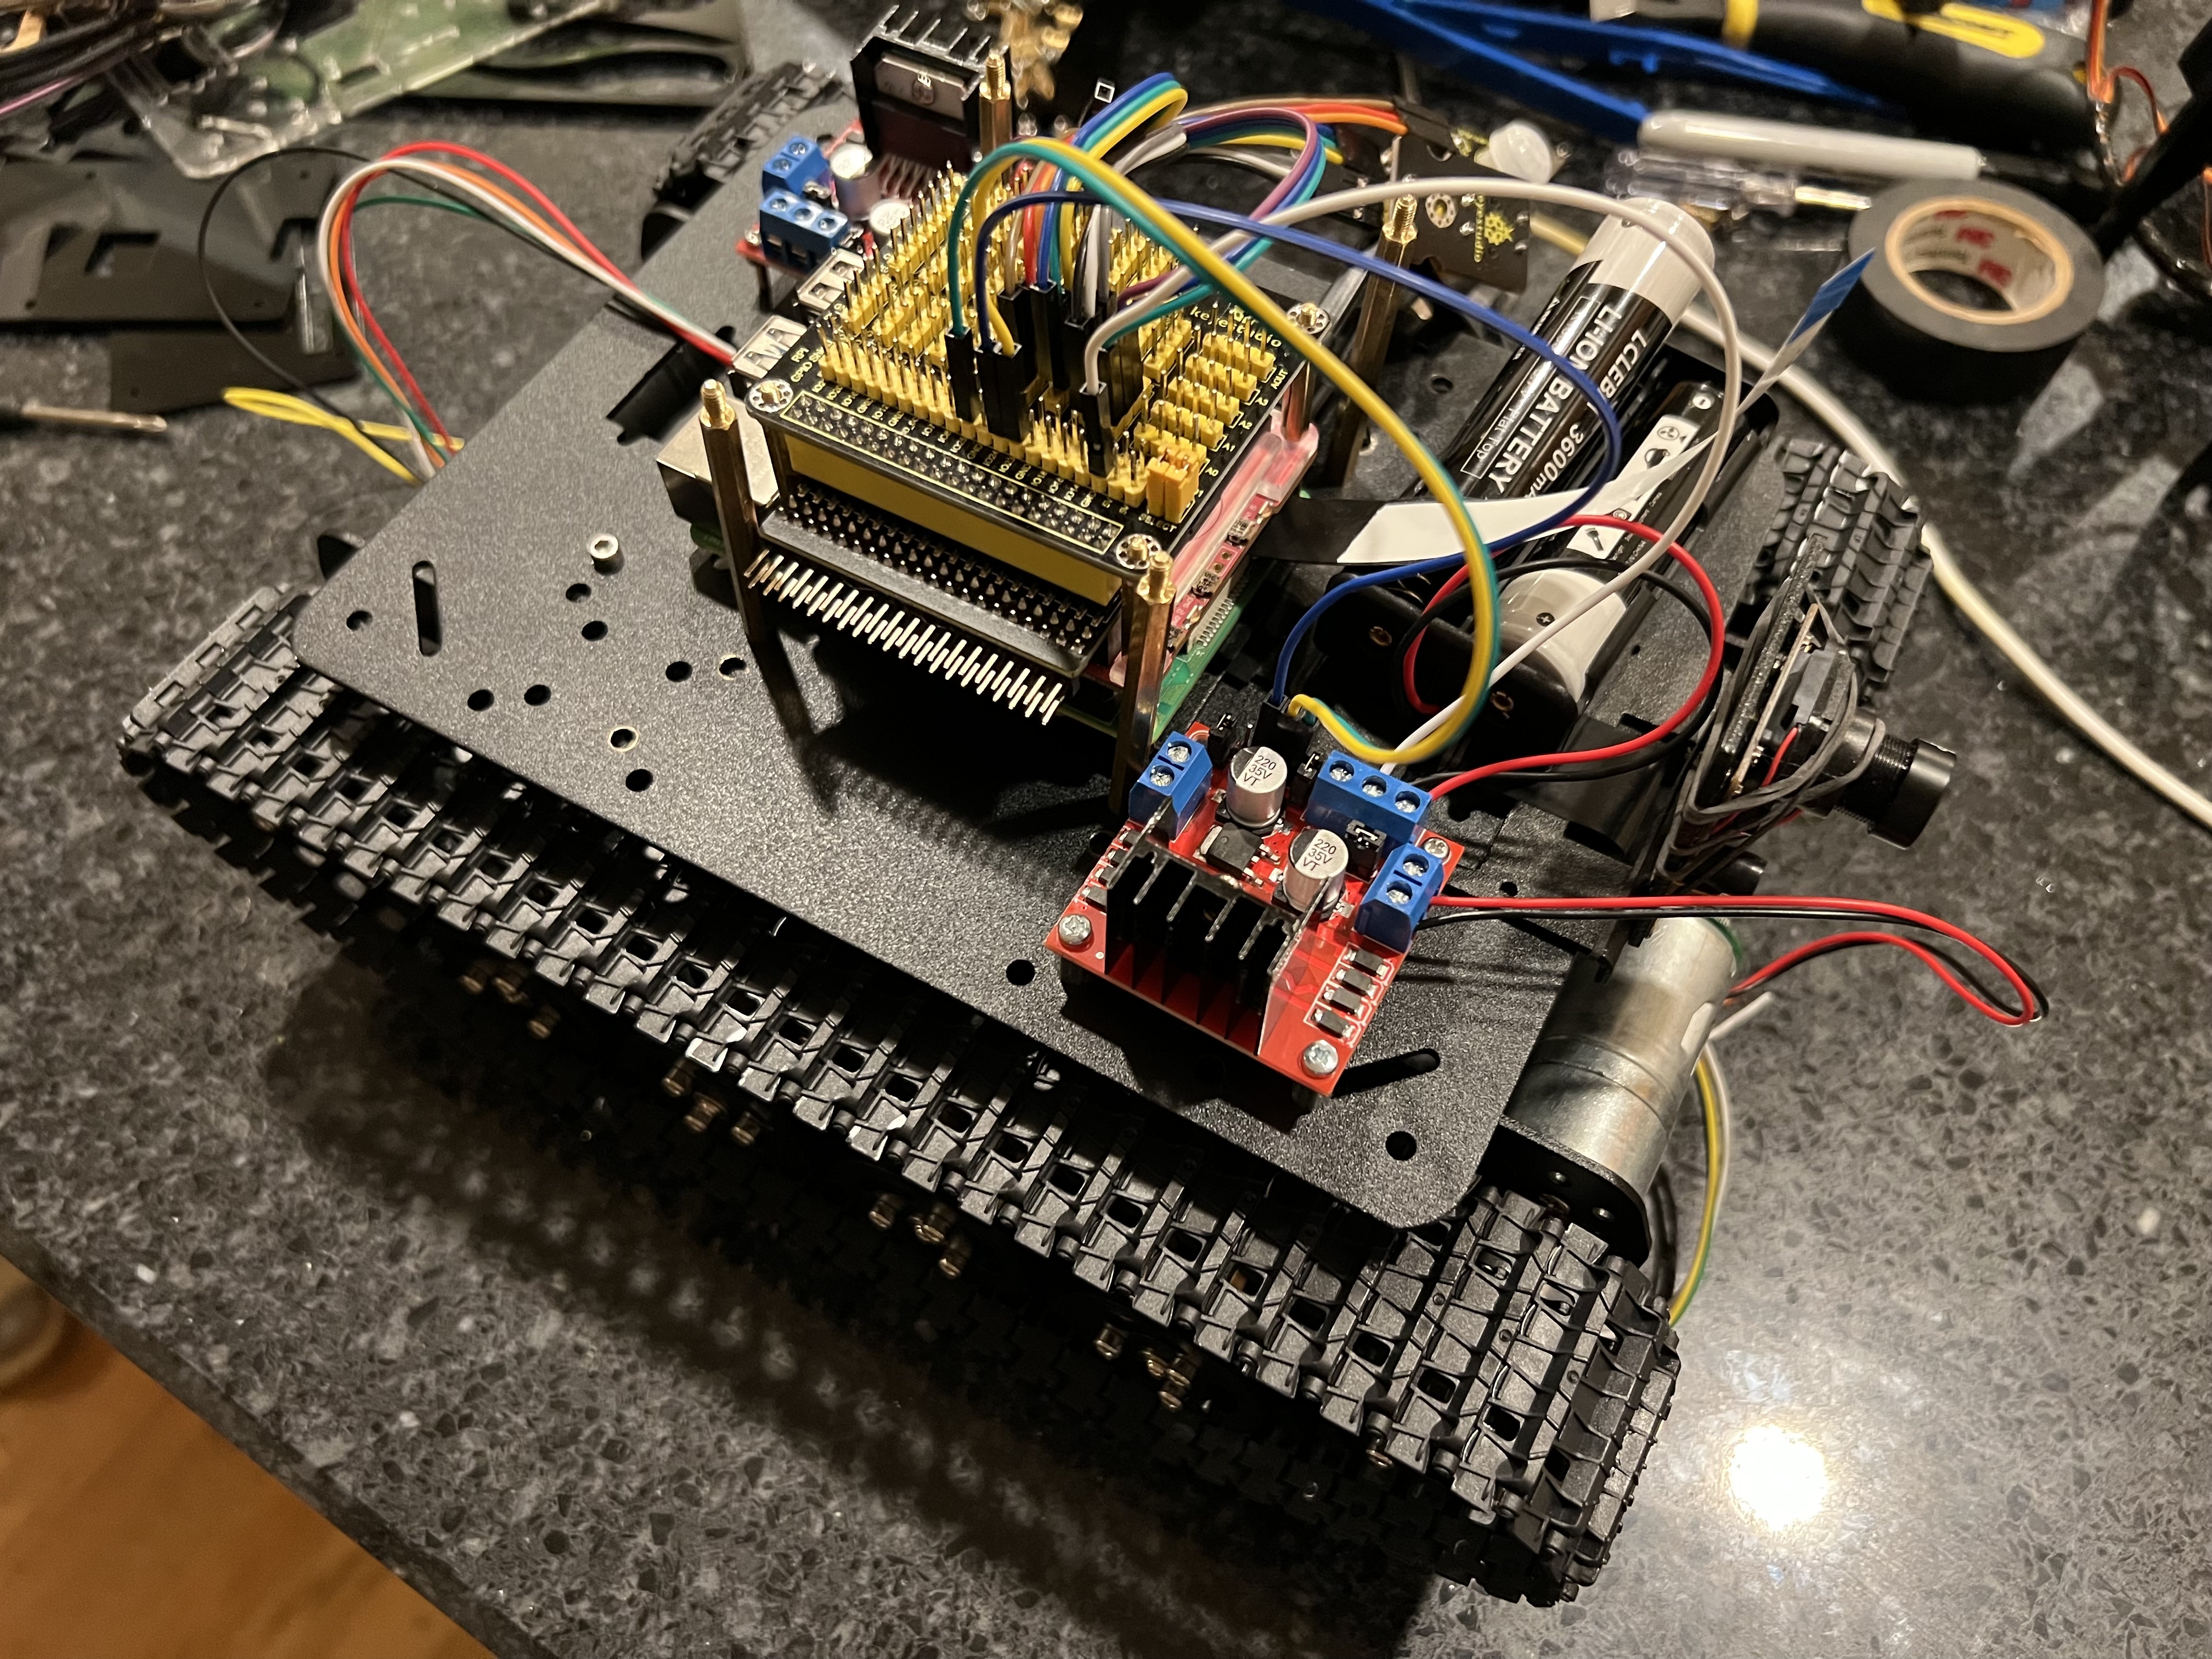
Mounted L298N chips
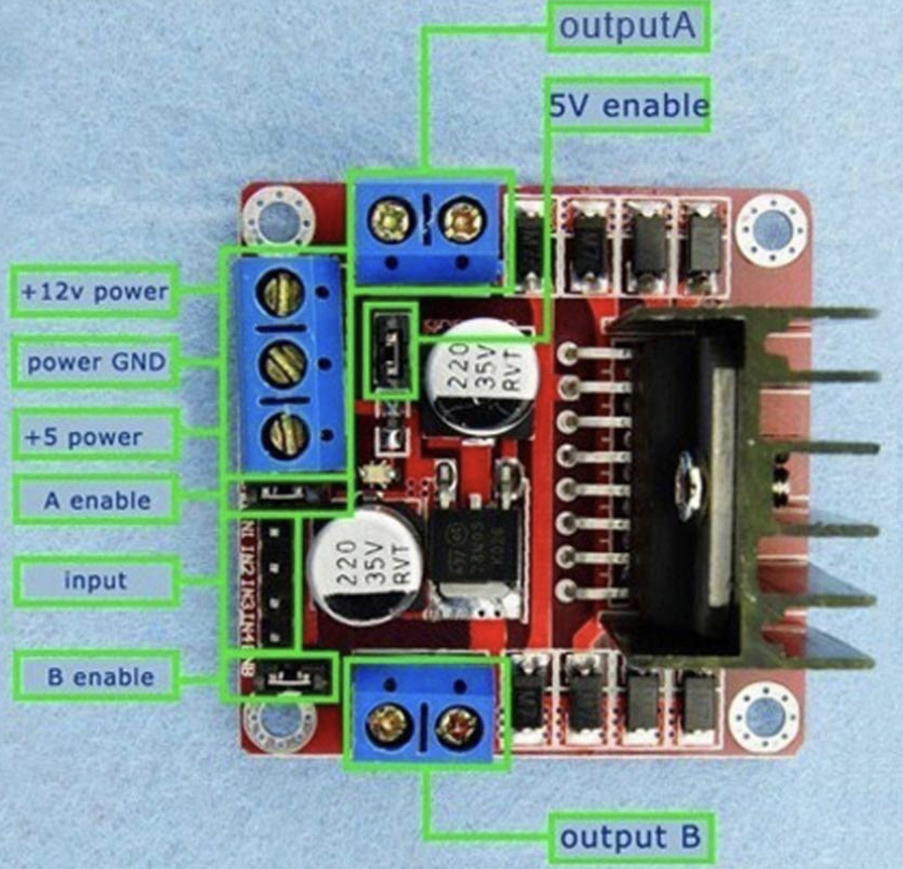
L298N Motor Driver
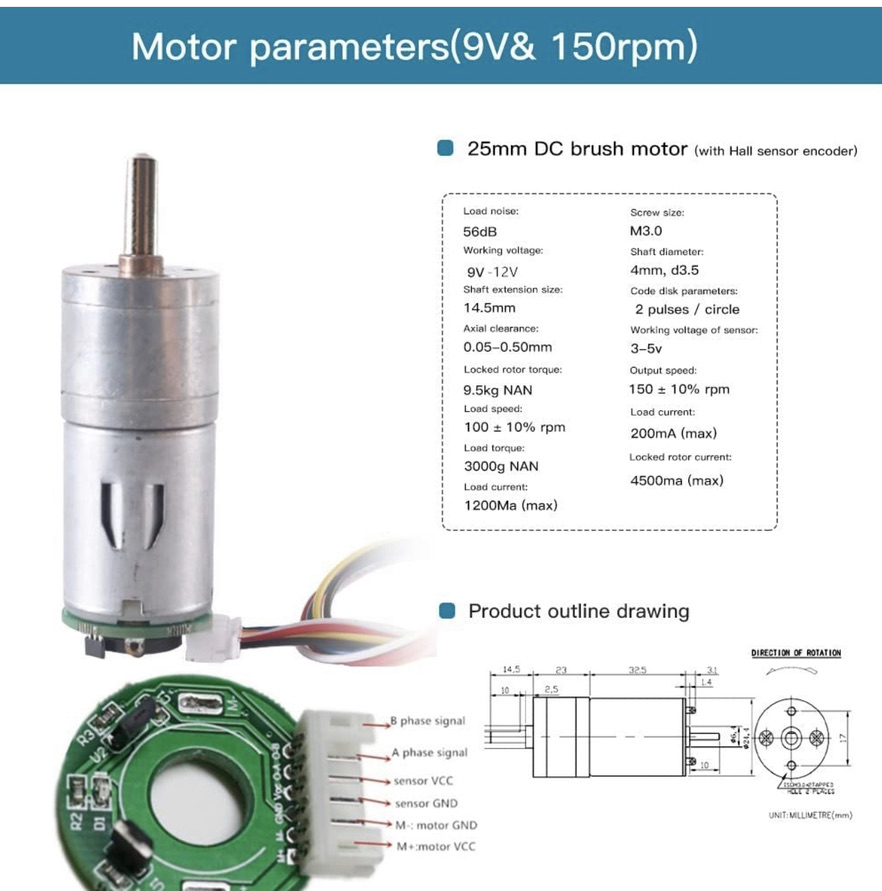
DC Motor
3. Remote Control via RF24
The Hexapod Spider Bot uses two NRF24L01+ wireless transceivers for communication. I initially attempted to re-implement the RF24 code in Python but encountered issues that I couldn't seem to resolve. Subsequently, I decided to try out C++, with which I surprisingly had success. The (very) rough code can be found here.
Here are some videos demonstrations:
- C++ RF24 Remote Control Strobe Light
- C++ RF24 Remote Control Driving
- C++ RF24 Receive Signal Success
4. Tank Client/Server via REST API
After working with RF24 a bit, I started to think that there could be an easier way. The plan is as follows:
- Build a core Tank library to simplify interactions with the Tank.
- Construct an HTTP web server using Flask to run on the Raspberry Pi.
- Use Python due to ease-of-use and the plethora of libraries available for ML, NLP, GPIO, OpenCV, Flask, etc.
- Develop multiple Tank clients: CLI, PostMan, React App, PyGame + PS5 Controller.
tank.py
Primary Tank code
import RPi.GPIO as GPIO
from enum import Enum

R_PIN_ENABLE_A = 25
R_PIN_IN1 = 24
R_PIN_IN2 = 23

L_PIN_ENABLE_A = 16
L_PIN_IN1 = 20
L_PIN_IN2 = 26

GPIO.setmode(GPIO.BCM)  # use BCM numbers


class Direction(Enum):
    STOP = 0
    FORWARD = 1
    REVERSE = 2


class Track:
    def __init__(self, pin_enableA: int, pin_in1: int, pin_in2: int, is_inverted: bool = False):
        print("Init Track, enA: " + str(pin_enableA) + ", in1: " + str(pin_in1) + ", in2: " + str(pin_in2))
        self.pin_enableA = pin_enableA
        self.pin_in1 = pin_in1
        self.pin_in2 = pin_in2
        self.pwmMax: int = 100
        self.pwmStart: int = 100
        self.speed: int = 100  # not used
        self.direction = Direction.STOP
        self.is_inverted = is_inverted

        GPIO.setup(pin_in1, GPIO.OUT)
        GPIO.setup(pin_in2, GPIO.OUT)
        GPIO.setup(pin_enableA, GPIO.OUT)

        GPIO.setup(pin_in1, GPIO.LOW)
        GPIO.setup(pin_in2, GPIO.LOW)

        self.pwm = GPIO.PWM(pin_enableA, self.pwmMax)
        self.pwm.start(self.pwmStart)

    def forward(self):
        print("track forward")
        self.direction = Direction.FORWARD
        if not self.is_inverted:
            GPIO.output(self.pin_in1, True)
            GPIO.output(self.pin_in2, False)
            self.set_speed(self.speed)
            # self.pwm.ChangeDutyCycle(100)
        else:
            GPIO.output(self.pin_in1, False)
            GPIO.output(self.pin_in2, True)
            self.set_speed(self.speed)
            # self.pwm.ChangeDutyCycle(0)

    def reverse(self):
        print("track reverse")
        self.direction = Direction.REVERSE
        if not self.is_inverted:
            GPIO.output(self.pin_in1, False)
            GPIO.output(self.pin_in2, True)
            self.set_speed(self.speed)
            # self.pwm.ChangeDutyCycle(0)
        else:
            GPIO.output(self.pin_in1, True)
            GPIO.output(self.pin_in2, False)
            self.set_speed(self.speed)
            # self.pwm.ChangeDutyCycle(100)

    def stop(self):
        print("track stop")
        self.direction = Direction.STOP
        GPIO.output(self.pin_in1, False)
        GPIO.output(self.pin_in2, False)
        # keep speed as-is, and change duty cycle so that resuming movement will use last speed.
        self.pwm.ChangeDutyCycle(0)

    def set_speed(self, speed: int):
        self.speed = speed
        if self.speed >= 100:
            self.speed = 100
        elif self.speed < 0:
            self.speed = 0

        print("speed: " + str(self.speed))

        # if motor is not running, only set the internal speed. speed will be passed to motor when tank moves.
        if self.direction == Direction.STOP:
            print("tank stopped, not changing motor speed")
            return

        # # in the case speed is 0, then just call our helper function to stop the track
        # if self.speed == 0:
        #     self.direction = Direction.STOP
        #     self.stop()

        if self.direction == Direction.FORWARD:
            if not self.is_inverted:
                self.pwm.ChangeDutyCycle(self.speed)
            else:
                self.pwm.ChangeDutyCycle(100 - self.speed)
        elif self.direction == Direction.REVERSE:
            if not self.is_inverted:
                self.pwm.ChangeDutyCycle(100 - self.speed)
            else:
                self.pwm.ChangeDutyCycle(self.speed)

    def speed_up(self):
        print("speed++")
        self.set_speed(self.speed + 10)

    def speed_down(self):
        print("speed--")
        self.set_speed(self.speed - 10)


class Tank:
    def __init__(self):
        self.left_track = Track(L_PIN_ENABLE_A, L_PIN_IN1, L_PIN_IN2, is_inverted=True)
        self.right_track = Track(R_PIN_ENABLE_A, R_PIN_IN1, R_PIN_IN2, is_inverted=True)

    def status(self):
        return {
            'leftTrack': {
                'speed': self.left_track.speed
            },
            'rightTrack': {
                'speed': self.right_track.speed
            }
        }

    def cleanup(self):
        GPIO.cleanup()

    def left_track_forward(self):
        self.left_track.forward()

    def left_track_reverse(self):
        self.left_track.reverse()

    def left_track_stop(self):
        self.left_track.stop()

    def right_track_forward(self):
        self.right_track.forward()

    def right_track_reverse(self):
        self.right_track.reverse()

    def right_track_stop(self):
        self.right_track.stop()

    def forward(self):
        print("forward")
        self.left_track.forward()
        self.right_track.forward()

    def reverse(self):
        print("reverse")
        self.left_track.reverse()
        self.right_track.reverse()

    def stop(self):
        print("stop")
        self.left_track.stop()
        self.right_track.stop()

    def turn_left(self):
        print("turn left")
        self.left_track.stop()
        self.right_track.forward()

    def turn_right(self):
        print("turn right")
        self.left_track.forward()
        self.right_track.stop()

    def rotate_clockwise(self):
        print("rotate clockwise")
        self.left_track.forward()
        self.right_track.reverse()

    def rotate_counterclockwise(self):
        print("rotate counterclockwise")
        self.left_track.reverse()
        self.right_track.forward()

    def right_track_speed_up(self):
        print("right track speed++")
        self.right_track.speed_up()

    def right_track_speed_down(self):
        print("right track speed--")
        self.right_track.speed_down()

    def left_track_speed_up(self):
        print("left track speed++")
        self.left_track.speed_up()

    def left_track_speed_down(self):
        print("left track speed--")
        self.left_track.speed_down()

    def speed_up(self):
        print("speed++")
        self.left_track.speed_up()
        self.right_track.speed_up()
        return self.status()

    def speed_down(self):
        print("speed--")
        self.left_track.speed_down()
        self.right_track.speed_down()
        return self.status()

    def set_speed(self, speed: int):
        print("set speed: " + str(speed))
        self.left_track.set_speed(speed)
        self.right_track.set_speed(speed)
        return self.status()
tank_server.py
A lightweight http server for interfacing with a Tank.
from flask import Flask
from flask_cors import CORS
from .tank import Tank

tank = Tank()
tank.stop()

app = Flask(__name__)
CORS(app)

@app.route('/tank/status', methods=['GET'])
def tank_status():
    return tank.status()

@app.route('/tank/forward', methods=['POST'])
def tank_forward():
    tank.forward()
    return ""

@app.route('/tank/reverse', methods=['POST'])
def tank_reverse():
    tank.reverse()
    return ""

@app.route('/tank/stop', methods=['POST'])
def tank_stop():
    tank.stop()
    return ""

@app.route('/tank/turn-left', methods=['POST'])
def tank_turn_left():
    tank.turn_left()
    return ""

@app.route('/tank/turn-right', methods=['POST'])
def tank_turn_right():
    tank.turn_right()
    return ""

@app.route('/tank/left-track/forward', methods=['POST'])
def tank_left_track_forward():
    tank.left_track_forward()
    return ""

@app.route('/tank/left-track/reverse', methods=['POST'])
def tank_left_track_reverse():
    tank.left_track_reverse()
    return ""

@app.route('/tank/left-track/stop', methods=['POST'])
def tank_left_track_stop():
    tank.left_track_stop()
    return ""

@app.route('/tank/right-track/forward', methods=['POST'])
def tank_right_track_forward():
    tank.right_track_forward()
    return ""

@app.route('/tank/right-track/reverse', methods=['POST'])
def tank_right_track_reverse():
    tank.right_track_reverse()
    return ""

@app.route('/tank/right-track/stop', methods=['POST'])
def tank_right_track_stop():
    tank.right_track_stop()
    return ""

@app.route('/tank/clockwise', methods=['POST'])
def tank_clockwise():
    tank.rotate_clockwise()
    return ""

@app.route('/tank/counter-clockwise', methods=['POST'])
def tank_rotate_counterclockwise():
    tank.rotate_counterclockwise()
    return ""

@app.route('/tank/speed-up', methods=['POST'])
def tank_speed_up():
    return tank.speed_up()

@app.route('/tank/speed-down', methods=['POST'])
def tank_speed_down():
    return tank.speed_down()

@app.route('/tank/speed/<speed>', methods=['POST'])
def tank_set_speed(speed: str):
    return tank.set_speed(int(speed))
Starting the Tank Server
After SSHing into the Raspberry Pi, run the following commands to start the Flask Server.
export FLASK_APP=tank_server
flask run -h 192.168.4.76 -p 8080
PyGame Client + PS5 Controller
This ended up being my favorite implementation because it was straightforward to set up and worked seamlessly. The left and right joysticks controlled the left and right tracks respectively. Later in this post, we'll use PyGame again to render the video stream from the front-mounted camera.
tank_client_ps5_controller.py
from enum import Enum

import pygame
import requests
import os
os.environ["SDL_JOYSTICK_ALLOW_BACKGROUND_EVENTS"] = "1"

pygame.init()
pygame.event.set_grab(True)

API_URL = "http://spider.local:8080{}"

class Direction(Enum):
    FORWARD = 1
    NEUTRAL = 2
    REVERSE = 3


class TankClientController:

    def __init__(self):
        self.left_track_direction = Direction.NEUTRAL
        self.right_track_direction = Direction.NEUTRAL

    def start(self):
        requests.post(API_URL.format("/tank/stop"))
        running = True
        while running:
            for event in pygame.event.get():
                if event.type == pygame.QUIT:
                    running = False

            joystick_count = pygame.joystick.get_count()
            if joystick_count == 0:
                print("No joysticks connected")
            else:
                joystick = pygame.joystick.Joystick(0)
                joystick.init()

                left_joystick_x = joystick.get_axis(0)
                left_joystick_y = joystick.get_axis(1)

                right_joystick_x = joystick.get_axis(2)
                right_joystick_y = joystick.get_axis(3)

                # print("L({}, {}), R({}, {})".format(left_joystick_x, left_joystick_y, right_joystick_x, right_joystick_y))

                if left_joystick_y < -0.9:
                    if self.left_track_direction != Direction.FORWARD:
                        self.left_track_direction = Direction.FORWARD
                        print("call /tank/left-track/forward")
                        requests.post(API_URL.format("/tank/left-track/forward"))

                elif left_joystick_y > 0.9:
                    if self.left_track_direction != Direction.REVERSE:
                        self.left_track_direction = Direction.REVERSE
                        print("call /tank/left-track/reverse")
                        requests.post(API_URL.format("/tank/left-track/reverse"))
                else:
                    if self.left_track_direction != Direction.NEUTRAL:
                        self.left_track_direction = Direction.NEUTRAL
                        print("call /tank/left-track/stop")
                        requests.post(API_URL.format("/tank/left-track/stop"))

                if right_joystick_y < -0.9:
                    if self.right_track_direction != Direction.FORWARD:
                        self.right_track_direction = Direction.FORWARD
                        print("call /tank/right-track/forward")
                        requests.post(API_URL.format("/tank/right-track/forward"))

                elif right_joystick_y > 0.9:
                    if self.right_track_direction != Direction.REVERSE:
                        self.right_track_direction = Direction.REVERSE
                        print("call /tank/right-track/reverse")
                        requests.post(API_URL.format("/tank/right-track/reverse"))
                else:
                    if self.right_track_direction != Direction.NEUTRAL:
                        self.right_track_direction = Direction.NEUTRAL
                        print("call /tank/right-track/stop")
                        requests.post(API_URL.format("/tank/right-track/stop"))

        pygame.quit()


tank_client_controller = TankClientController()
tank_client_controller.start()
React Web
Although I found the PyGame + PS5 controller to be my favorite Tank Client, I initially thought it would be fun to construct a React/Typescript app to interface with the Tank Server.
The code can be found here.
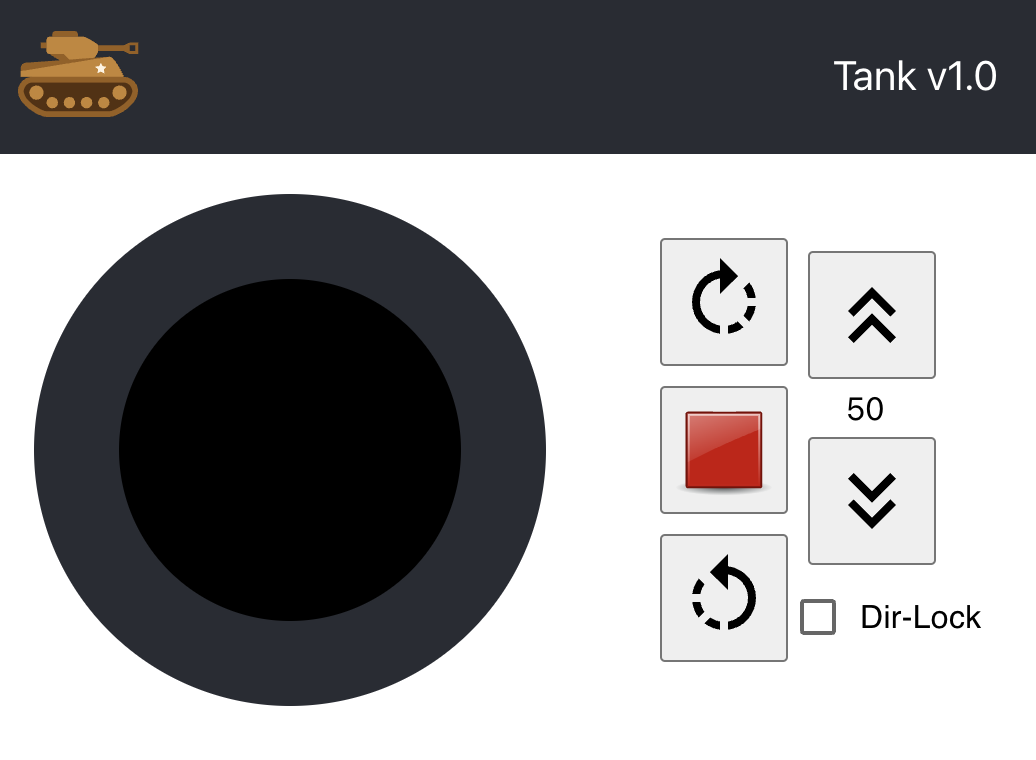
SSH + Tank CLI
You can SSH into the Raspberry Pi and run tank_cli.py to control the tank via CLI.
5. Portable Power Supply
The two DC motors and two L298N motor drivers are powered by two 3600mAh Flat Top 3.7V 30A Rechargeable Batteries. These are charged with a Universal Smart Battery Charger 4 Bay for Rechargeable Batteries with LCD Display.
For the Raspberry Pi, I have been using a USB-C Battery Pack rated for the Raspberry Pi 4, with a capacity of 10,000mAh and an output of 5V 2.4A. I have been using this setup for over half a year now with no complaints.
TODO: Initially, I installed a PiJuice HAT but encountered issues and put it on hold. I would like to come back and finish the setup.
6. Video Streaming + OpenCV
Handling streaming video with OpenCV is very similar to the approach we used with the Hexapod Spider Bot.
Video Streaming over TCP
To stream video from the Raspberry Pi to a client computer, I used libcamera-vid and ffplay/vlc.
For my video client, I used either my primary laptop or a Raspberry Pi 3 with a monitor.
Server (spider.local)
libcamera-vid -t 0 -q 100 --framerate 3 -n --codec mjpeg --inline --listen -o tcp://192.168.4.76:8888 -v
or with lower quality and a higher framerate.
libcamera-vid -t 0 -q 50 --framerate 10 -n --codec mjpeg --inline --listen -o tcp://192.168.4.76:8888 -v
Client (VLC -> Open Network)
tcp/mjpeg://192.168.4.76:8888
Client using FFPlay
ffplay -probesize 32 -analyzeduration 0 -fflags nobuffer -fflags flush_packets -flags low_delay -framerate 30 -framedrop tcp://192.168.4.76:8888
Notes:
- Occasionally, I began to experience video lag after a while. Reducing the quality and framerate seemed to alleviate the problem, but this issue occurred rather frequently.
- Another option that proved successful was setting up the Pi for a Virtual Desktop and using VNC Viewer, as detailed below.
- Using
libcamera-vidandffplay/vlcallows you to stream the webcam data directly to clients, without any need for video processing.
Video Streaming via PyGame + OpenCV
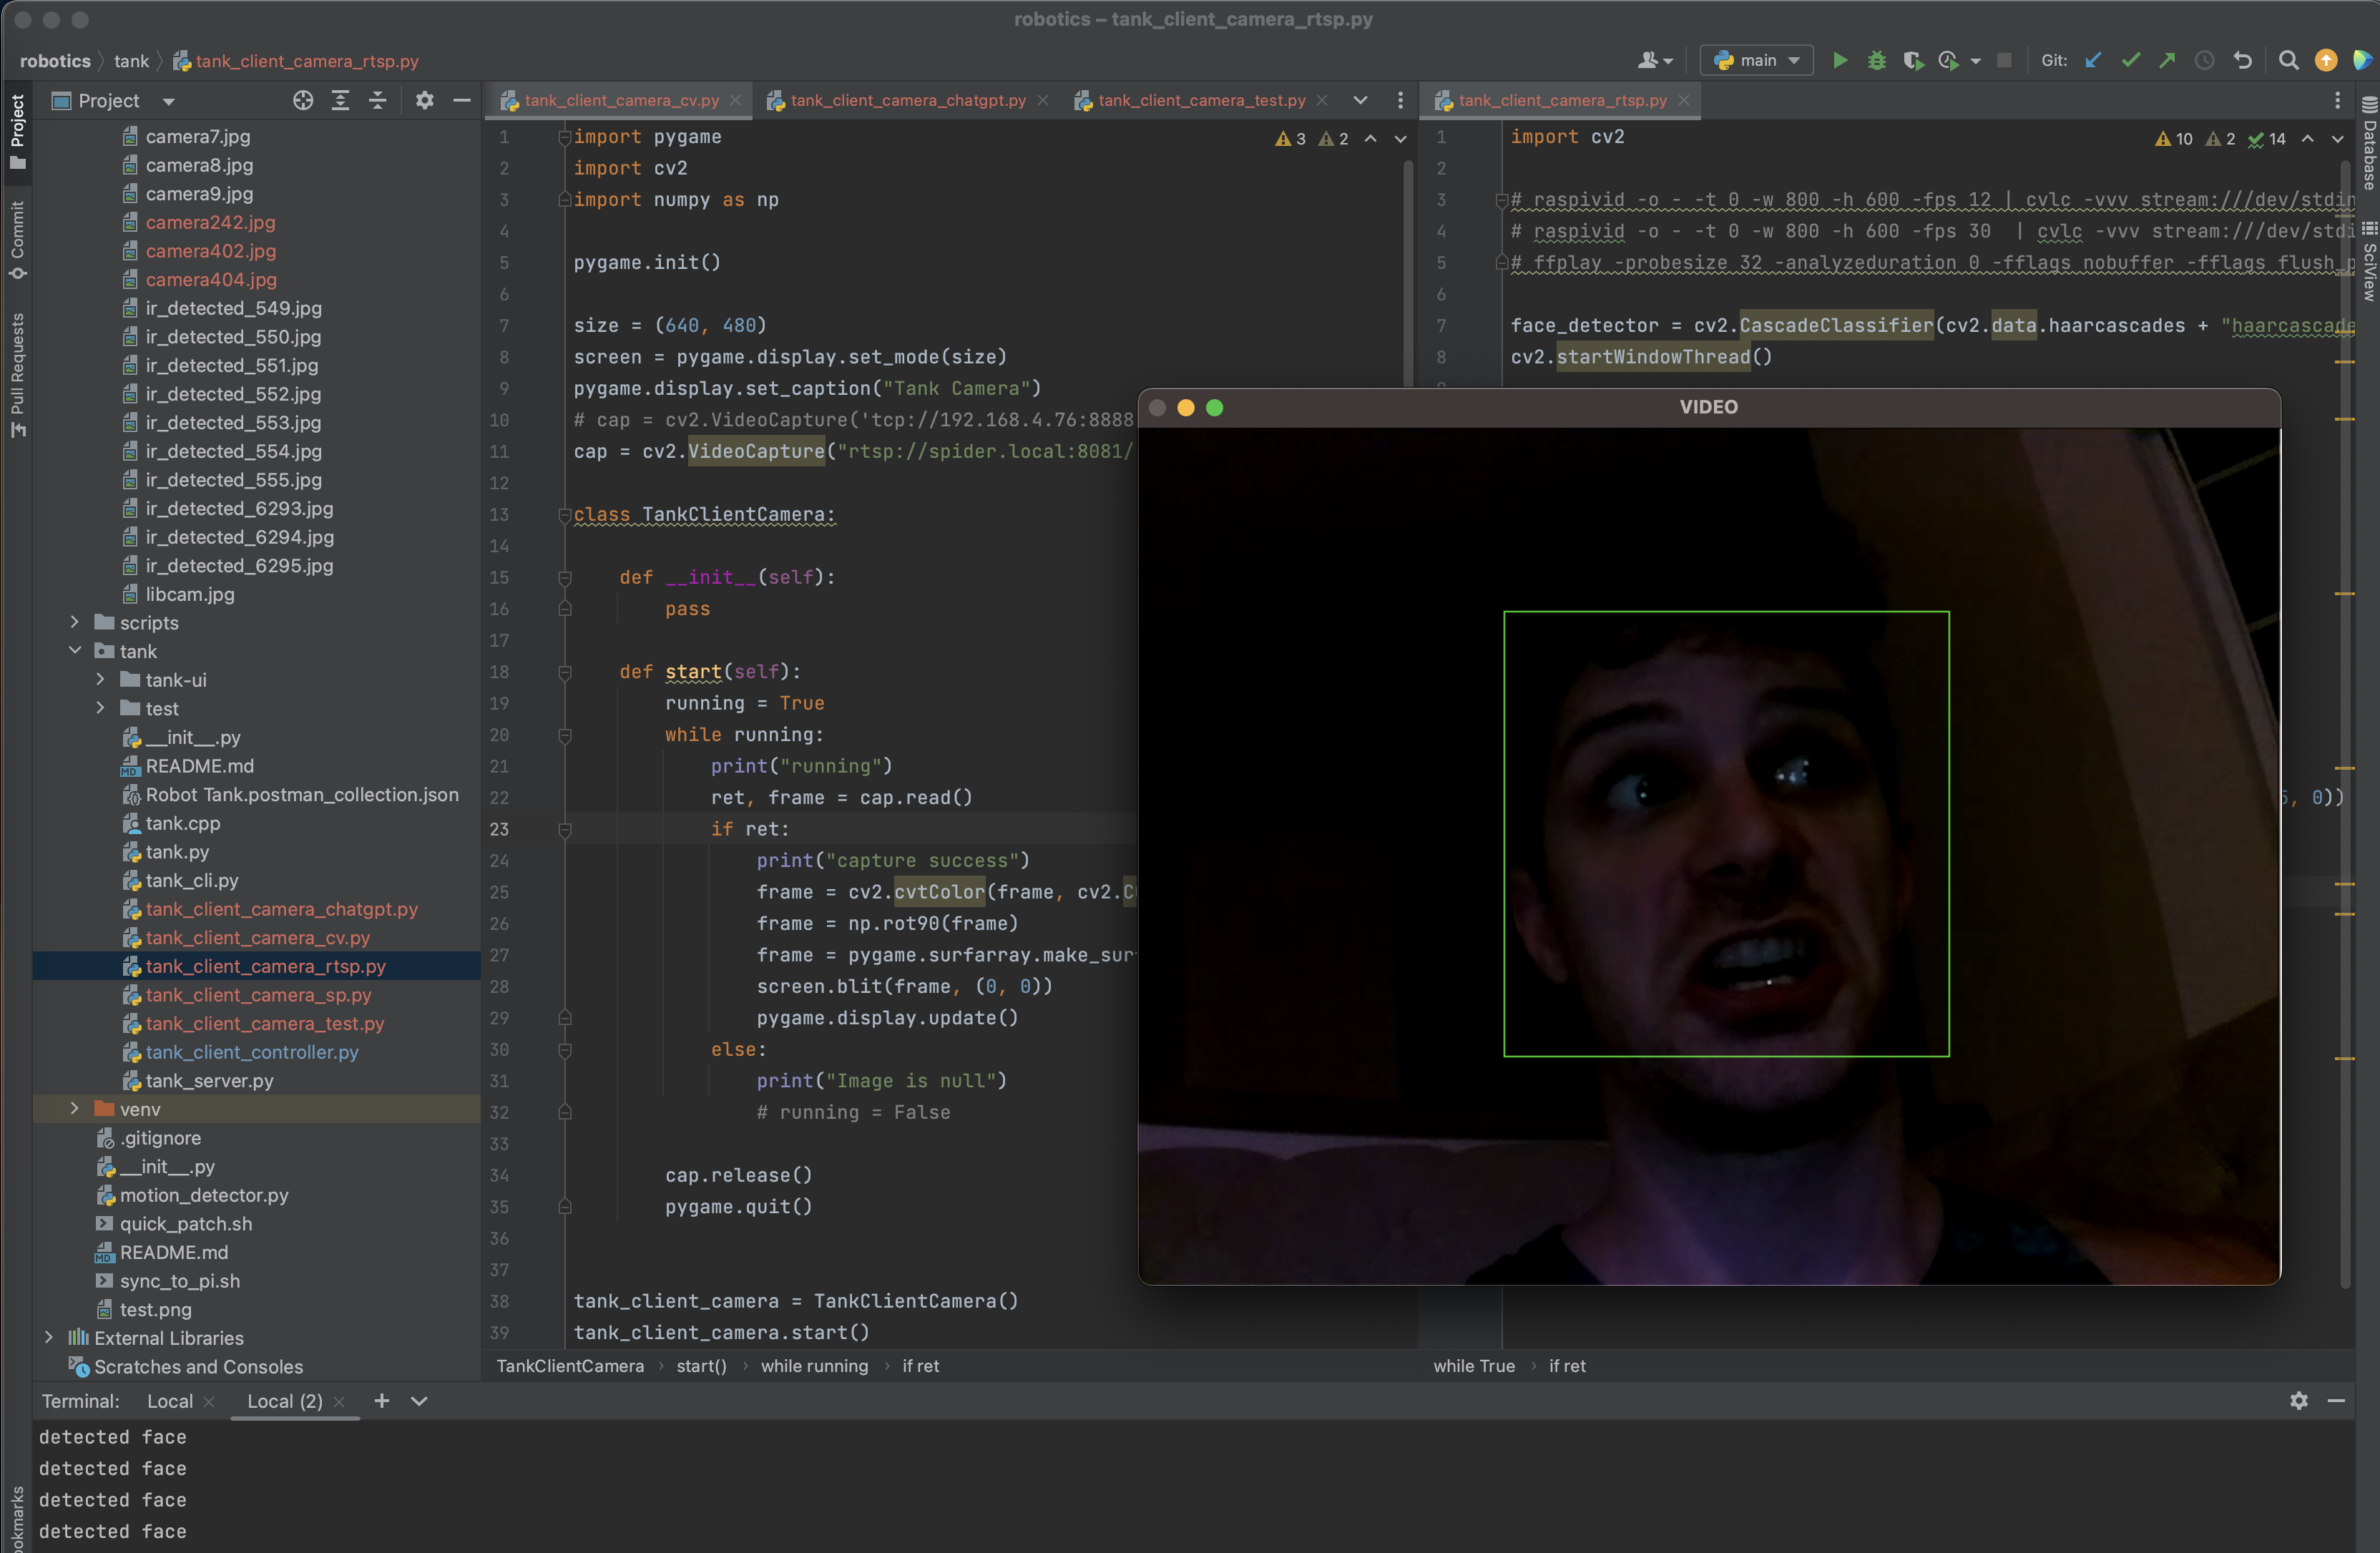
Below is the code for using PyGame to read the video stream and display it on the screen. This is where you can process the video data. For instance, you can perform face detection with OpenCV as we did in the Hexapod Spider Bot post.
import pygame
import cv2
import numpy as np

pygame.init()

size = (640, 480)
screen = pygame.display.set_mode(size)
pygame.display.set_caption("Tank Camera")
cap = cv2.VideoCapture('tcp://192.168.4.76:8888')
# cap = cv2.VideoCapture("rtsp://spider.local:8081/")

class TankClientCamera:

    def __init__(self):
        pass

    def start(self):
        running = True
        while running:
            print("running")
            ret, frame = cap.read()
            if ret:
                print("capture success")
                frame = cv2.cvtColor(frame, cv2.COLOR_BGR2RGB)
                frame = np.rot90(frame)
                frame = pygame.surfarray.make_surface(frame)
                screen.blit(frame, (0, 0))
                pygame.display.update()
            else:
                print("Image is null")

        cap.release()
        pygame.quit()


tank_client_camera = TankClientCamera()
tank_client_camera.start()
Demonstration of face detection.
7. Extensible Sensor/Peripherals
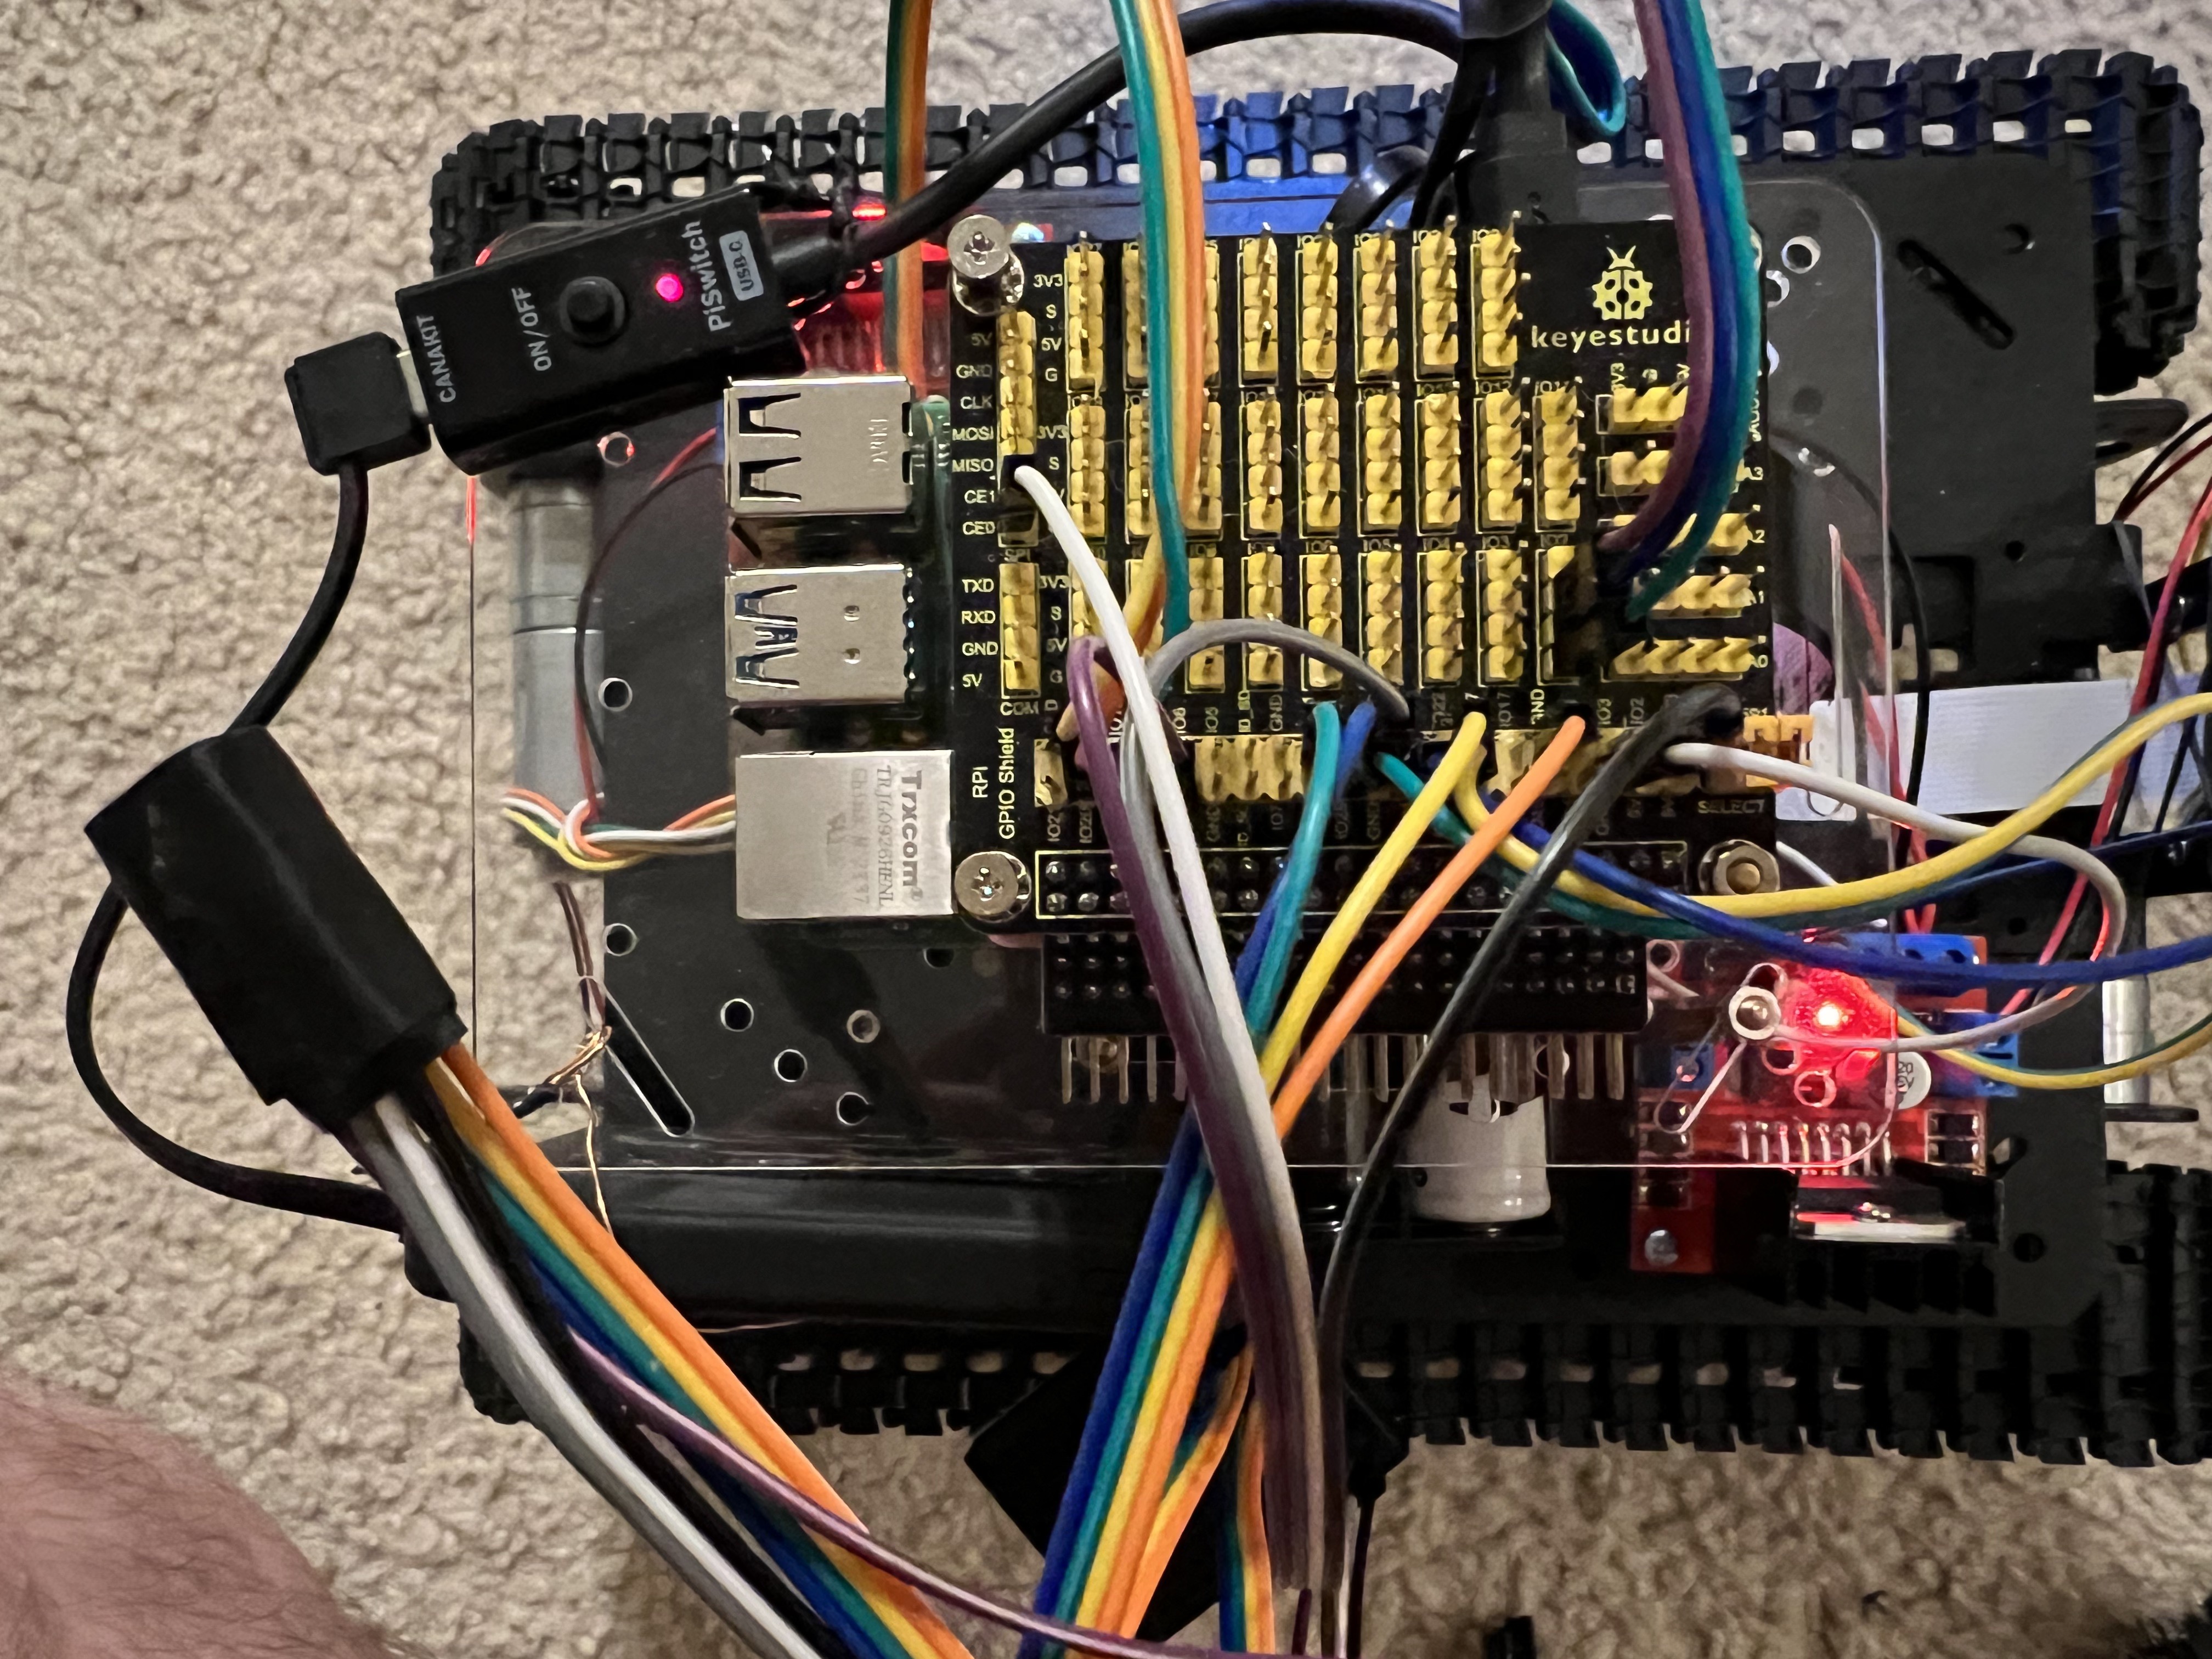
This image provides a top view of our GPIO board.
Components:
- An RF24 chip responsible for RF control
- A pair of L298N Motor Drivers for precise motor control
- A Flashlight for night adventures
- A Buzzer for communication using Morse Code
- An Infrared (IR) Detector for motion detection
The GPIO board interfaces seamlessly with the Raspberry Pi through a "40-pin GPIO T-Shaped Adapter". This allows for the installation of other devices, such as an Astro Pi HAT, for added functionality.
Hardware Shopping List
- SZDoit Smart Shock Absorption Robot Tank Car Chassis Kit with Suspension System
- HiLetgo 4pcs L298N Motor Driver Controller Board Module Stepper Motor DC Dual H-Bridge for Arduino Smart Car Power UNO MEGA R3 Mega2560
- Raspberry Pi 4
- Sumolink Mount Holder for Raspberry Pi HQ Camera Module
- NRF24L01+ Wireless Transceiver Module2.4G Wireless Transceiver Module
- GPIO Breakout Board + 37 Sensors Kit
- Dorhea for Raspberry Pi Camera Module Automatic IR-Cut Switching Day/Night Vision 1080p HD
- 40-pin GPIO adapters & extenders
- ELEGOO 120pcs Multicolored Dupont Wire 40pin Male to Female, 40pin Male to Male, 40pin Female to Female Breadboard Jumper Ribbon Cables Kit
- VGE Battery Pack for Raspberry Pi 4, 4000mAh, 5V 2.4A, Adhesive (USB-C)
- 3600mAh Flat Top 3.7V 30A Flat Top Rechargeable Battery
- Universal Smart Battery Charger 4 Bay for Rechargeable Batteries with LCD Display
- PiJuice HAT – A Portable Power Platform For Every Raspberry Pi (not used, optional)
- Astro Pi HAT (optional)
Videos
And one final bonus music video "Robots Dancing" with music by Cyriak.
 Arrived
 Ninja Turdle